Encountering an Initramfs error during booting can be frustrating for Linux users. This article aims to guide you through resolving this issue in a simple and detailed manner. From understanding the error message to implementing the necessary fixes, we’ll explore the steps involved in troubleshooting Initramfs errors and related challenges.
Table of Contents

Understanding the Initramfs Error
Initramfs, short for Initial RAM File System, is an essential component of the Linux boot process. When the system encounters errors during booting, it may display messages indicating issues with the Initramfs. These errors can stem from various causes, including file system corruption, disk errors, misconfigured boot parameters, or SATA operation mode issues.
Method 1: File System Check Approach
Enter Initramfs Interface
Upon encountering the Initramfs error message during boot, hit the ENTER key to enter Initramfs mode.
If prompted, navigate to the initramfs prompt by typing the appropriate command.
Perform File System Check
Identify the disk containing your Linux operating system. Use commands like blkid or fdisk -l to list available disks.
blkidfdisk -l
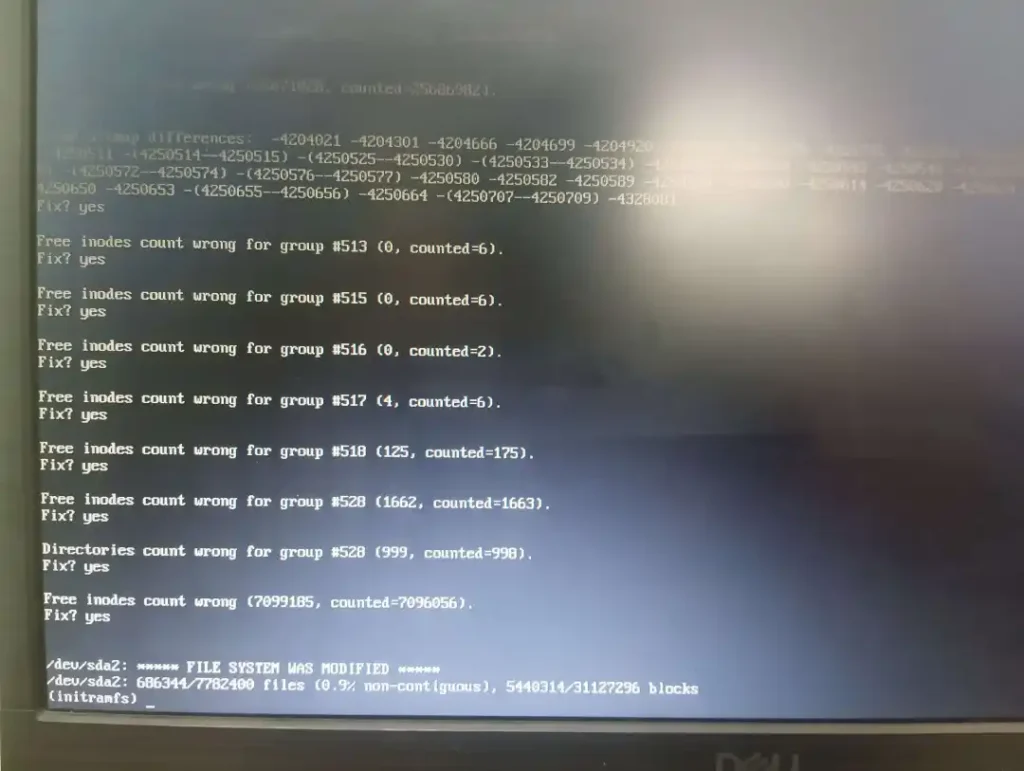
In the image above, we have utilized blkid to check the available disks in our system. Following this, you need to locate the disk containing your Linux file system, where your Linux operating system is installed. This entire process remains the same across Ubuntu, Mint, and Debian-based operating systems, so there is no need to worry. As you can see in the image, we have identified two partitions with the Ext4 file system type. The Linux file system typically utilizes Ext4 journaling.
You must make a note of this disk. It’s possible to encounter just one Ext4-type partition or multiple partitions. There’s no need to panic; we’ll resolve this in a straightforward manner.
Now that you have identified your partition, the next step involves using the prompt, which is:
fsck -f /dev/sda2 -y
Instead of ‘sda2’, you need to provide the name of your partition. We need to check all Ext4 partitions one by one using this command.
If an error occurs with this command, you can use the command with ‘sudo’ to resolve the issue:
sudo fsck -f /dev/sda2 -y
If an error persists, you should use the same command without ‘-y‘, like this: sudo fsck -f /dev/sda2.

Note: If the fsck and blkid commands are not working properly, you should first try Method 2 (BIOS configuration) before attempting this method.
After successfully checking, you will see the result indicating the file system has been repaired.
Reboot the System
After executing the file system check command, reboot the system using the reboot command:
rebootif reboot command don’t work then try exit
exit
This step ensures that the changes take effect, and the system attempts to boot normally.
Method 2: BIOS/SATA Configuration Fix (Busybox Initramfs Error)
If you encounter a Busybox initramfs error, follow these steps to resolve it:
Step 1: Restart Your System
First, restart your system using the reboot command. If that doesn’t work, you can use the poweroff command to power off the system, or manually turn off your laptop/computer using the power button.
Step 2: Access BIOS Settings
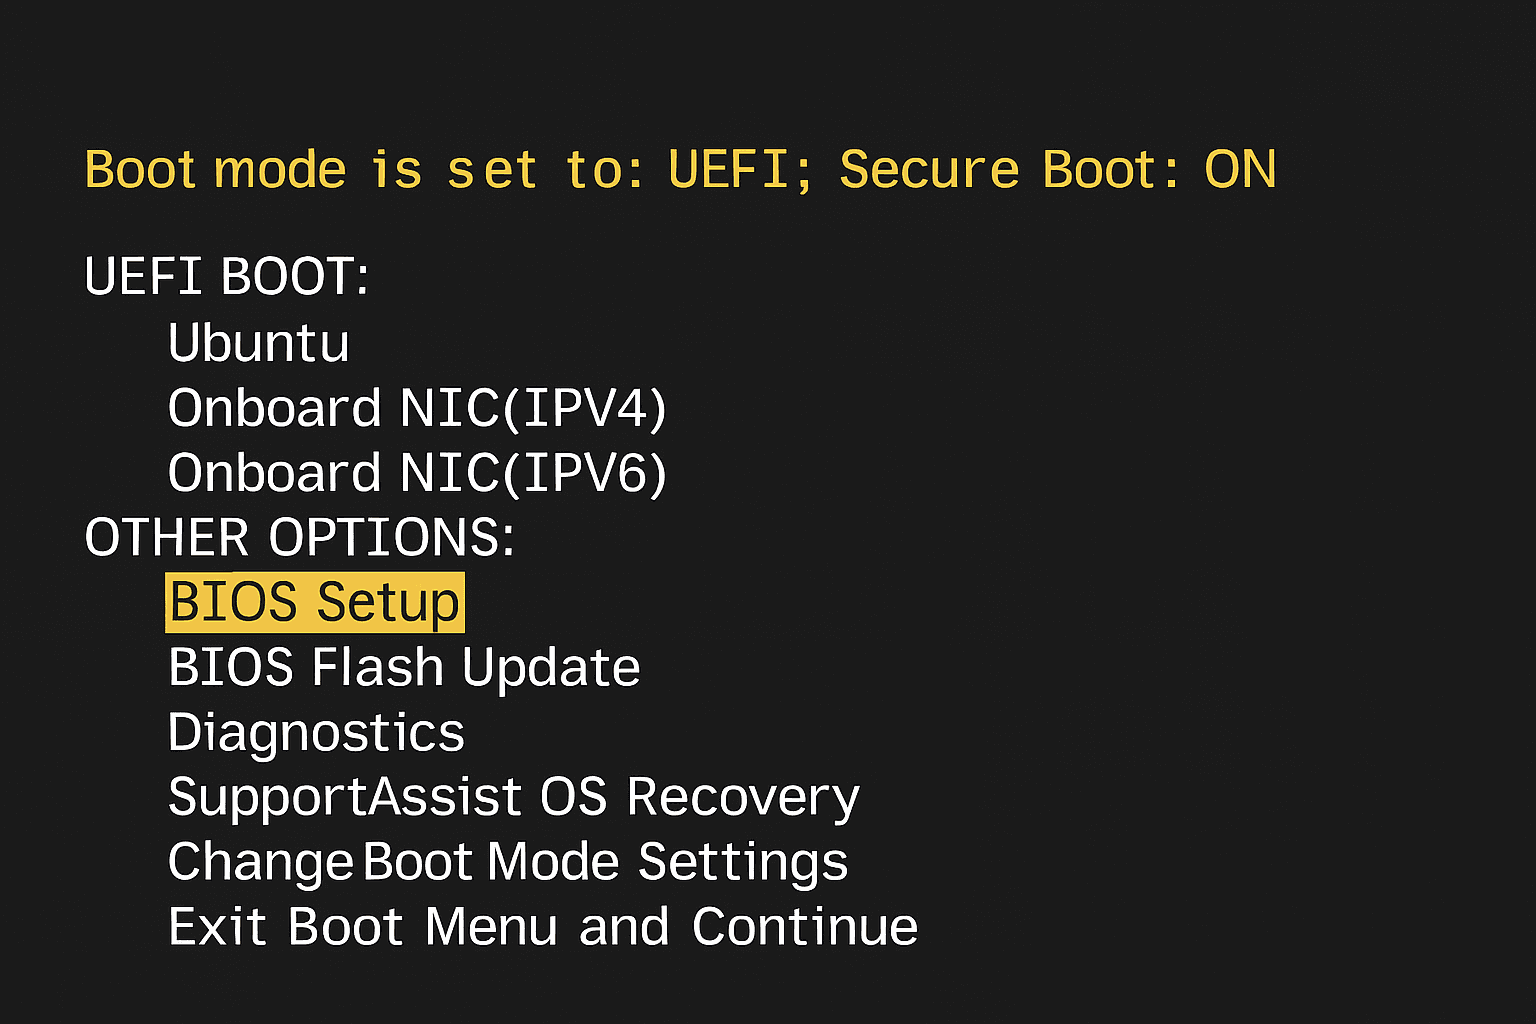
After turning off the system, restart it and immediately access the BIOS. The method to enter BIOS depends on your motherboard manufacturer:
- Common keys: F2, F12, or Del
- How to access: Continuously press one of these keys immediately after powering on your system
Step 3: Navigate to BIOS Setup

Once you’re in the BIOS, look for and navigate to “BIOS Setup” or similar option. The exact menu name may vary depending on your motherboard.
Step 4: Find System Configuration
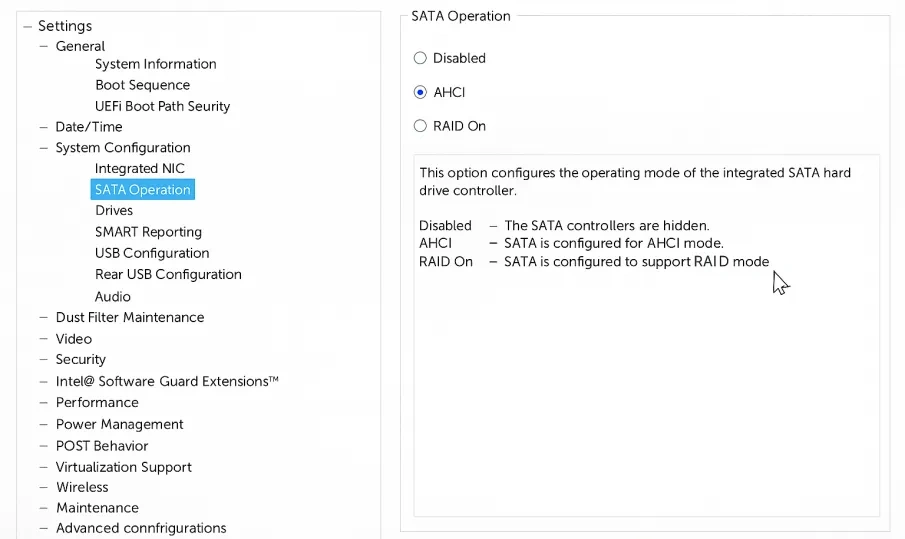
In the BIOS setup, locate and enter “System Configuration” menu.
Step 5: Change SATA Operation Mode

Within System Configuration, look for “SATA Operation” option. You’ll typically find different modes like:
- RAID
- AHCI
- IDE/Legacy
Select AHCI mode and save the settings.
Step 6: Save and Reboot
After selecting AHCI, save the BIOS settings (usually F10 or follow the on-screen instructions) and reboot your system.
Your computer should now boot normally and the initramfs error should be resolved. If the initramfs error still persists, try Method 1 (File System Check approach) as it should work after the BIOS configuration change.
Additional Considerations
Disk Identification: If your system comprises multiple disks, repeat the file system check process for each disk until the Initramfs error is resolved.
Backup and Recovery: Consider backing up important data before executing file system checks to mitigate the risk of data loss.
Kernel Parameters: Review and verify the kernel parameters configured in the boot loader configuration files (grub.cfg, menu.lst, etc.) for accuracy and consistency.
Hardware Compatibility: Some newer systems may require AHCI mode for proper disk operation, especially when using SSDs or modern hard drives.
Final Thought
Resolving Initramfs errors on Linux systems requires a systematic approach and an understanding of both file system management and hardware configuration. By following the outlined troubleshooting methods – starting with the BIOS/SATA configuration fix for Busybox errors, then proceeding to file system checks if needed – users can effectively address Initramfs-related boot issues and restore normal system functionality.
Remember to try Method 2 first if you encounter Busybox initramfs errors, as this is often the root cause of the problem. The file system check method (Method 1) works well as a secondary solution or for traditional initramfs errors not related to SATA configuration issues.


Wow, this paragraph is good, my sister is analyzing these things, therefore I am going to let know her.
Thank you for this helpful introductory article about initramfs. I have Linux 20.04 installed on an old mac mini. Right now whenever I boot the mini I am horribly stuck in this initramfs mode with the request to RUN fsck MANUALLY on /dev/sda2. After reading this and other articles I executed “fsck /dev/sda2 -y” multiple times to completion. However, after running the fsck the terminal says, “Error writing file system info: Input/output error” before the line “**** FILE SYSTEM WAS MODIFIED ****”. After this at the initramfs prompt the reboot command doesn’t work and the exit command brings back the message “/dev/sda2 contains a file system with errors, check forced.” Then the whole process begins over again. I am very stuck. If you have any further ideas, please let me know. Thank you again. In the meantime I will be looking into the kernel parameters you mentioned.
Glad to know it was helpfull for you stay tune for more article.